
At first there was nothing
Let's say you have nothing to start, so go buy a computer ... ok just kidding.
To start, you'll need some of these tools
- An IDE editor like Visual Sutdio code (https://code.visualstudio.com/)
- NodeJS and NPM at least v17.5.0 (https://nodejs.org/en/download/)
- The proton-cli, a Command Line Interface (https://github.com/ProtonProtocol/proton-cli)
- A command line terminal, this can be integrated with your IDE
and you need to be confortable with these skills
- Command line tool (like command prompt on window, or terminal on MAC Os)
- Typescript basic (https://www.typescriptlang.org/)
- Know how ES6 module works (https://developer.mozilla.org/en-US/docs/Web/JavaScript/Guide/Modules)
- What the f. is WebAssembly (https://webassembly.org/)
- Runing NPM command (https://www.npmjs.com/)
- Basic understanding of how smart contract works the EOSIO/Proton way
- Now what RTFM/RTFCB mean (not required but those acronym are cool)
First thing first
We need to install the proton-cli as global NPM package, so open your terminal (i personnaly use iTerm on macOS with OhMyZSH and Power10k theme) and type:
|
or with yarn
|
If you encounter issue while installation, go to https://github.com/ProtonProtocol/proton-cli
Let there be light
Now create a folder where you want. And name it, let's say ... proton-smart-contracts (oh yeah very creative) and enter in this newly created dir.
|
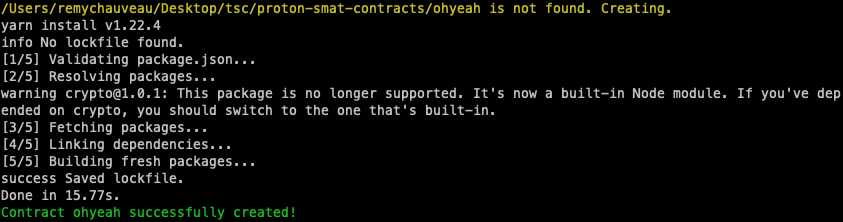
Proton CLI is built with a bunch of command that allow us to interact with the proton blockchain, but the one that have our interest is proton contract:create CONTRACTNAME where CONTRACTNAME is the name of the account on which the contract will be deployed, lets name it 'ohyeah'...
|
And you should end with something like this
Great, now the script have created an `ohyeah` folder with a bunch of files, go inside the folder and you should have the following list

The two files that having our interest is ohyeah.contract.ts which is the smart contract itself and playground.ts a file that allow you to writte some testing code using the proton-vert library, a blockchain emulator (a really cool idea !)
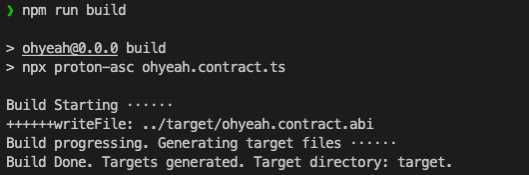
Now it's time to open the beast in our code editor and open the package.json file. and locate the script block. Inside this we have 2 npm command, the build command and the playground command.
The build command is the most important one because it compile your contract onto the files format needed by the Proton protocol: ohyeah.contract.abi and ohyeah.contract.wasm.

After runing the build command you will find those files in the target folder, so let's see...
|
Let's check our folders structure and we see our compiled files !
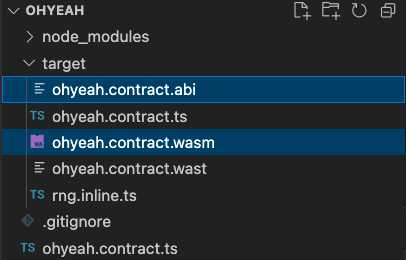
And boom ! Voilà, you have compiled successfuly you first smart contract, great job !
In the next post, we will dig deeper and start a real world exemple :)
Till the next post, take care and be curious !


Cathelper76 2 yrs
This is easier than what we do on WAX. There you have to put up a docker thing up XD. It consumes memory like the best.